SCCM: How to Create Task Sequence for OSD
In order to create OSD Task Sequence you need to have you image created and added to SCCM. Below are the links how to do that:How to capture OS image
How to add OS image
Also you must have SCCM client package ready:
How to create SCCM client Package and Program for OSD
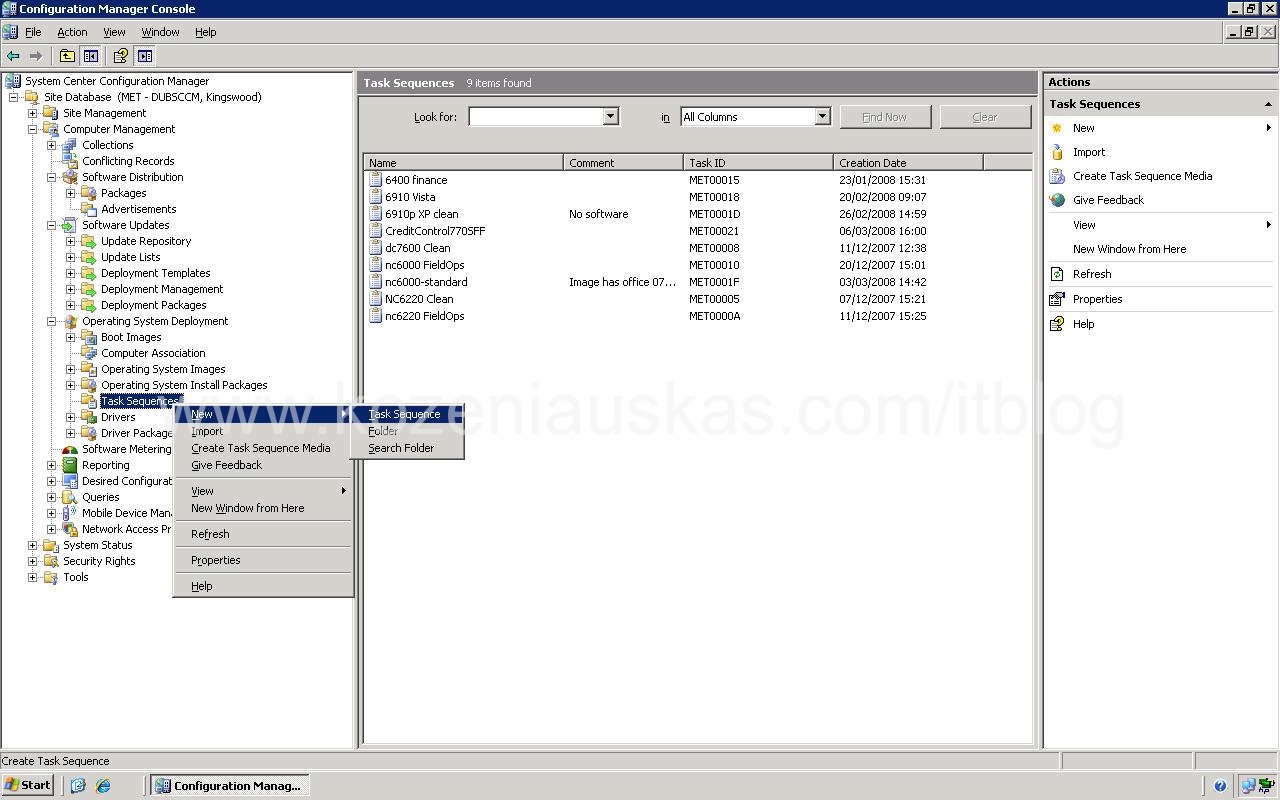
Open Configuration Manager Console
Go to System Center Configuration Manager>Site Database>Computer Management>Operating System Deployment
Right click on Task Sequences and select New>Task Sequence
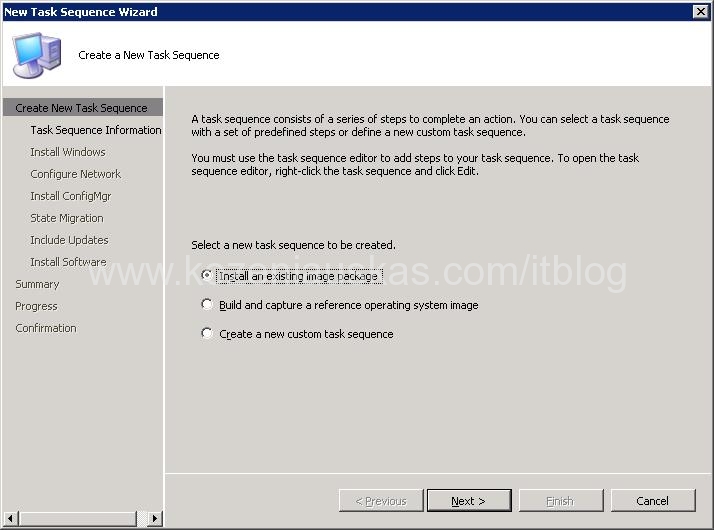
New Task Sequence Wizard will start
Select Install an existing Image package and click Next
Give a name to your task sequence and select Boot image
Click Next

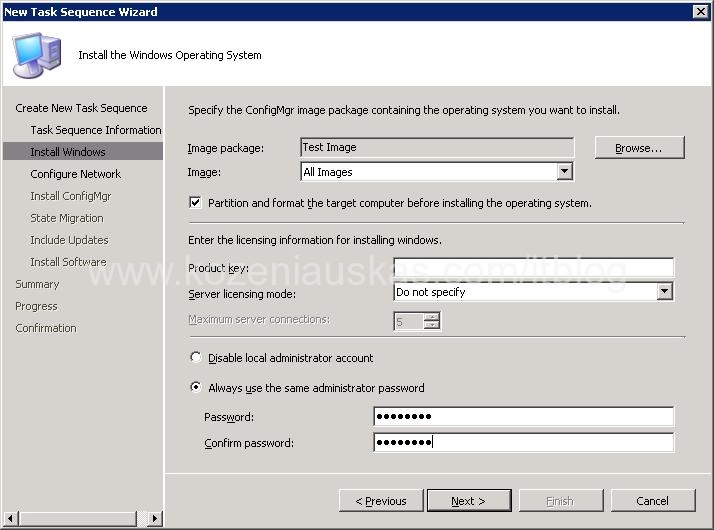
In Install the Windows Operating Systemclick Browse and select the image that you wan to use.
Select Partition and format the target computer before installing operating system
Enter the OS Product Key
Select Licensing Mode this is needed for server OS
You can enable or disable Local administrator account. If you enable it you have to type the password. Click Next
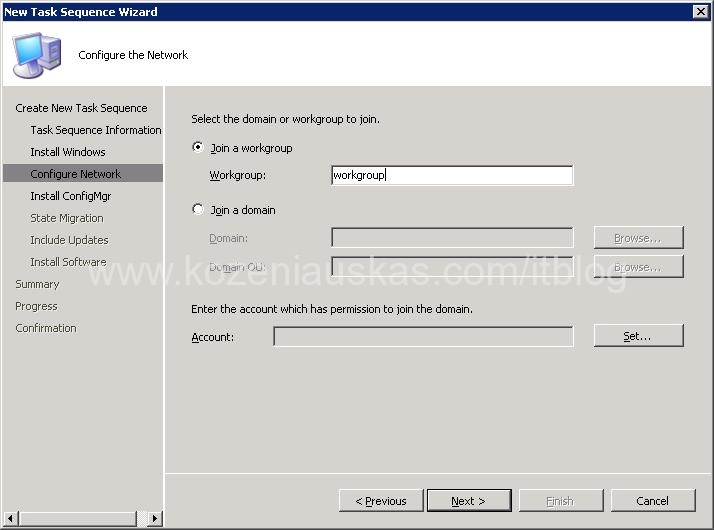
If you want you can join PC to domain but then you need to provide all the required details. Click Next
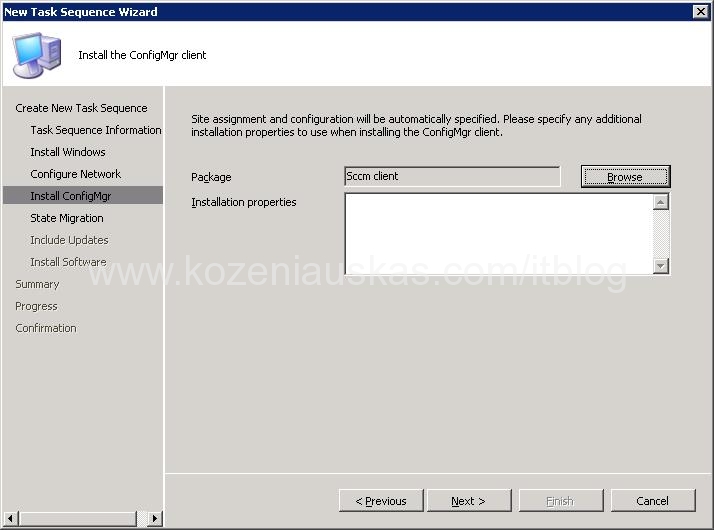
Now you need to provide SCCM client Package which you created earlier(How to create SCCM client Package and Program for OSD) and click Next.
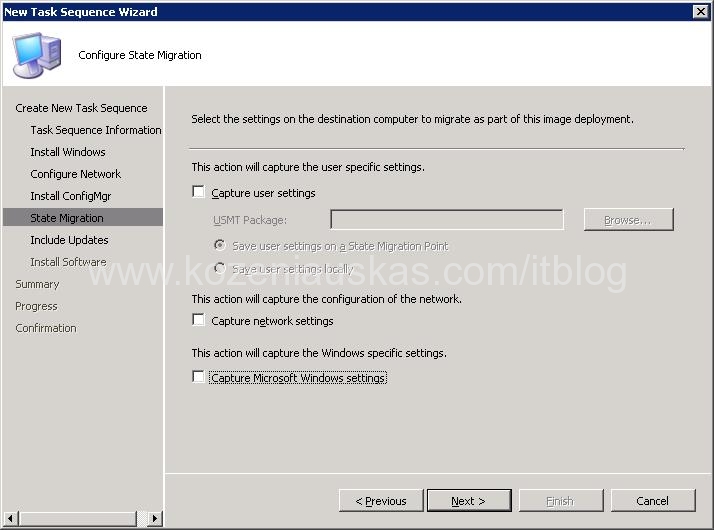
Untick all the boxes in Configure State Migration. This is because we are not migrating PC.
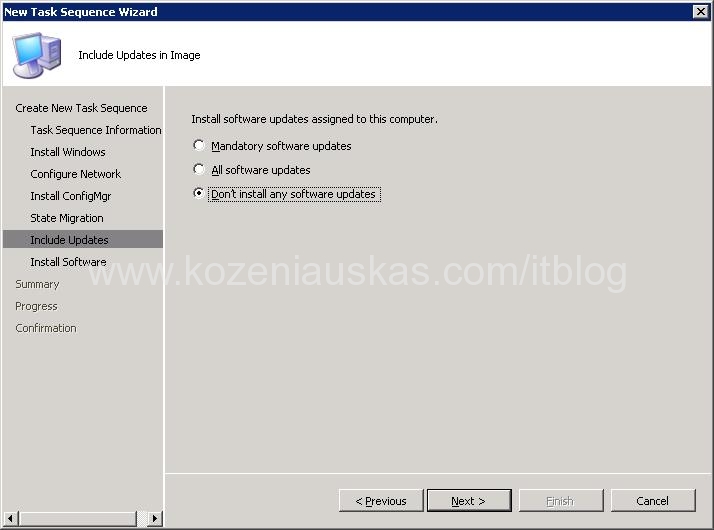
If you have Updates configured in SCCM environment then you can install them during the imaging process. In my cae i slect Don’t install any software updates.
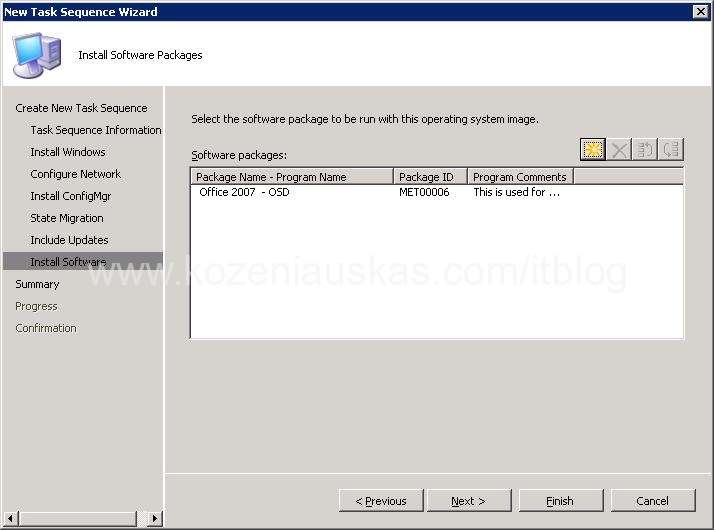
You can make SCCM install software during imaging. But you have to have packages prepared beforehand. I selected Office 2007. You can leave it blank. Click Next.
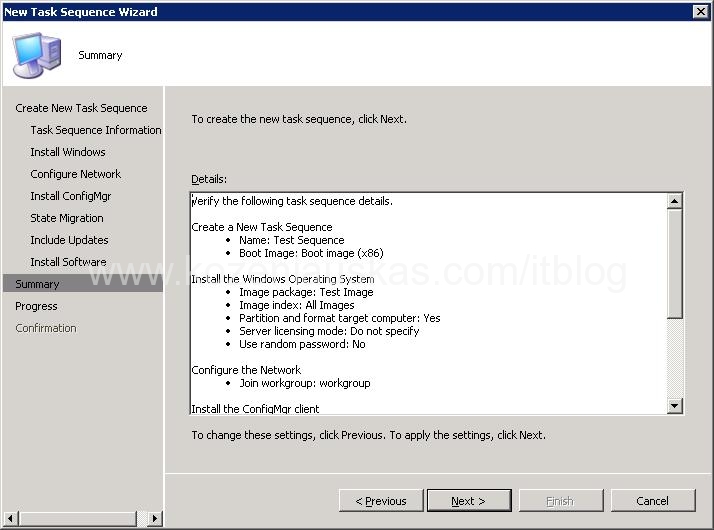
Review the summary and click Next.
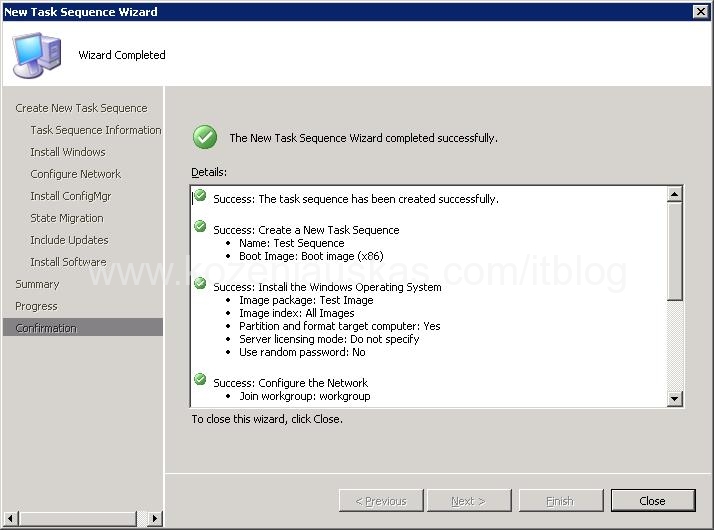
Wait for progress to finish and click Close.
The task sequence is ready but by default the SCCM does not use Quick format after creating partitions. So depending on your drive size it can take some time to format the drive. So here are the steps to change that.
Go to System Center Configuration Manager>Site Database>Computer Management>Operating System Deployment>Task Sequences
Right click on Task Sequence you have just created and select Edit

Select Partition Disk
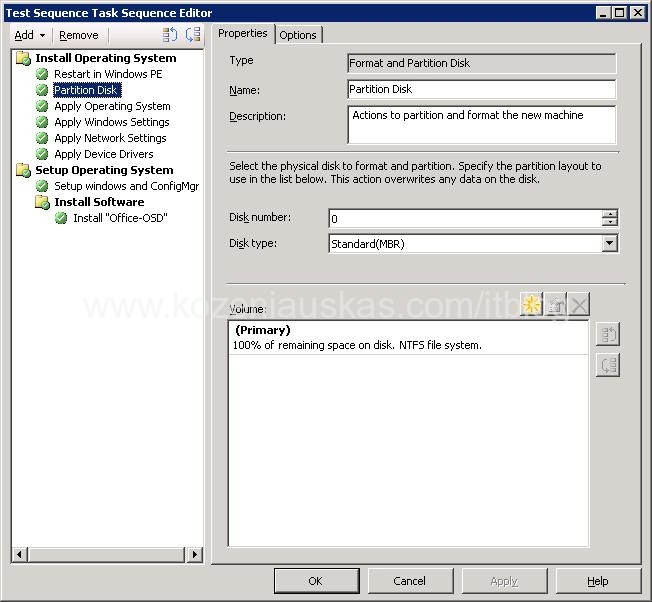
Under Volume right click on Primary partition and select Properties
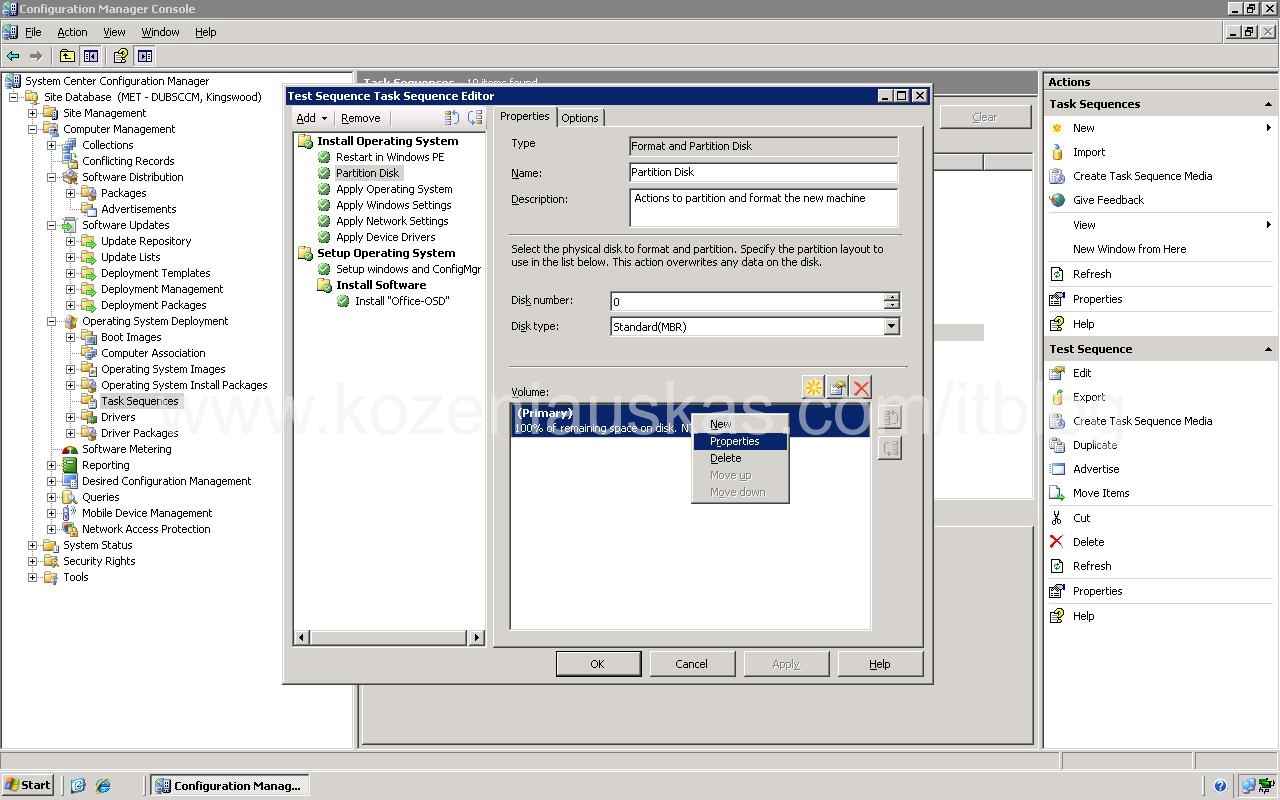
In Properties tick Quick Format. Click OK and OK again in Task Sequence Editor.
No comments:
Post a Comment