This is my 3rd article on SCCM in recent weeks, the 1st dealing with installation on a 2008 R2 host is here, the 2nd showing basic configuration is here. This article aims to provide a simple overview of windows 7 deployment for the novice SCCM user - its designed for those people using SCCM 2007 in a virtual/physical lab situation rather than those looking for production assistance.
SCCM2007 is a powerful multi-purpose system with many enterprise applications, one of which is deployment. Over the last few weeks I've been testing windows 7 deployment in a test-lab and have discovered a number of things 1) the guides which exist on the web are full of conflicting information and aren't entirely suited to novice IT professionals and 2) the process is easier than you think. With this guide I hope to give an end-end overview of the process, staying concise and keeping it directed at beginners.
Deployment through SCCM can be as simple or complex as required, but all deployment operations can be distilled down to a number of basic steps :-
1)Obtain and provide installation media and/or data files.
2)Create a task sequence to perform a 'build & capture' of the OS, packages, driver files and perform any system configuration.
3)Advertise the task sequence to one or more 'master' machines.
4)Perform the installation and Capture
5)Add the 'master' installation image to SCCM
6)Create a Task sequence for the installation process and advertise it to a collection.
7) Perform the installation on one, ten, one hundred or more target machines.
Installation Media & Preparation
Create a 'sources' tree at a suitable location on the SCCM server, for my lab environment this was the C drive in < c:\sources\os\7\retail\x6
At this stage we should also prepare the collections used further in the article. Expand < Site Database -> Computer Management -> Collections > and create a suitable structure, for my lab environment I've created a 'build and capture' parent folder, and a 'build and capture windows 7' child; if nothing else this will ensure that we are consistent between lab and production environments.
Next we need to ensure we have the SCCM2007 client installation package ready to go, it will be installed at a later stage so we can go ahead and create it now. Open the SCCM2007 console and navigate to 'Software Distribution -> Packages', Right Click 'new package from definition'.
Select the 'Configuration Manager Client Upgrade' and click 'Next'. On the following screen select 'Always obtain files from a Source Directory' and click 'Next'. On the screen displayed next set the options as shown in the screen-shot below, obviously altering the path as appropriate for your environment.
Finish the wizard and allow the package to be created. Once done, expand the package, select distribution points, right click and select 'new distribution points'. Which points you deploy to will depend on your environment but as a rule select any 'NON PXE' points as shown below. Complete the wizard and then update the distribution points in the usual way.
The last aspect we need to configure is to provide SCCM with the location of the installation files we copied in the first step above. Using SCCM2007 console navigate to < Site DB -> Computer Management -> Operating system deployment -> operating system install packages > Right Click and select 'Add operating system install package'.
When asked for the source directory path, enter the UNC location for the installation media you copied to the share earlier. In the case of my lab environment this is in < \\can-dev-dc2\sources\os\
Enter suitable detailed for the OS installation package as exemplified on the screengrab below and finish the wizard.
Once the package has been created, expand it in the SCCM console, select distribution points, right click -> new distribution points. Select any 'NON PXE' distribution points (be sure to pay attention at this stage) - the image is a installation image and NOT a boot image so selecting PXE would be wrong. Once completed, Right click distribution points and select 'Update Distribution points'.
Task Sequence
At this point the majority of the preparation activities have been completed. Our aim in this section is to create a task sequence which controls the installation of a base windows 7 image, together with a capture activity at the end of the process. The end result will be a master windows 7 image which can be used for any deployment activities within your lab, or around your organisation.
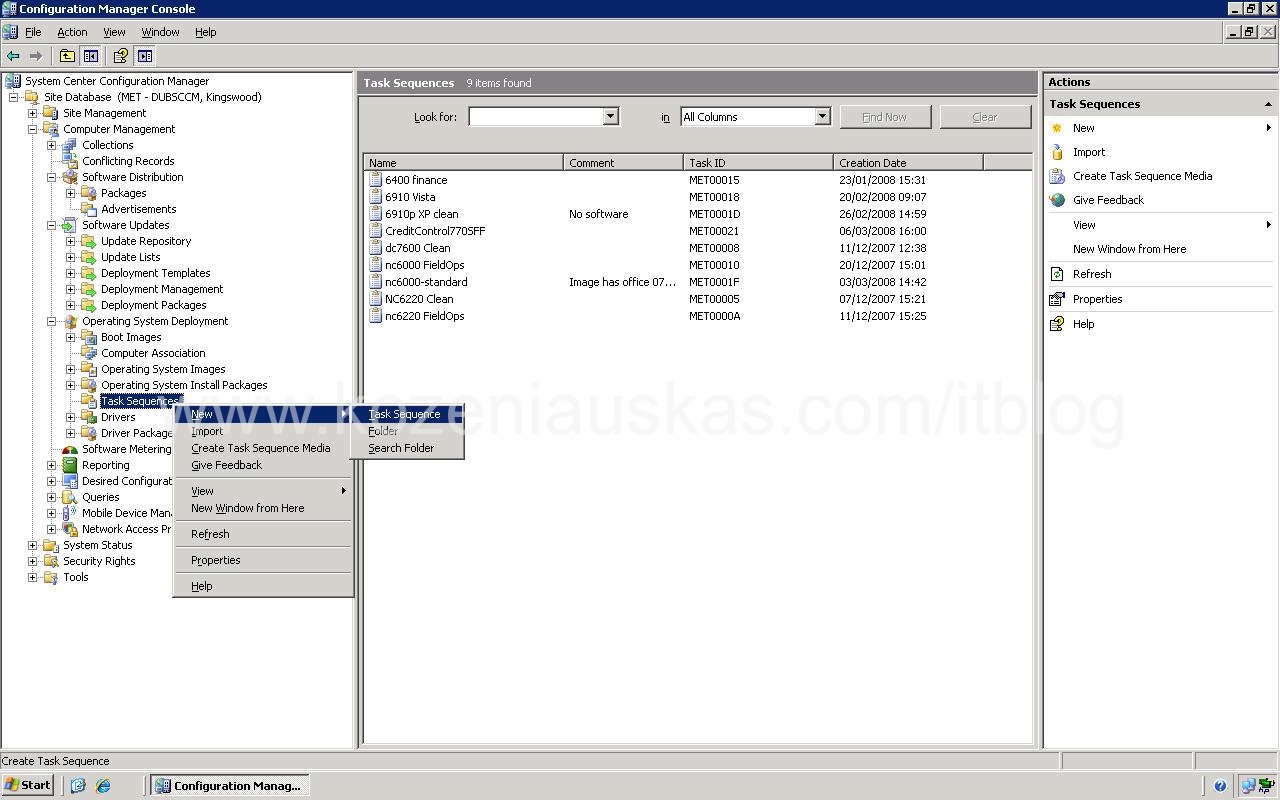
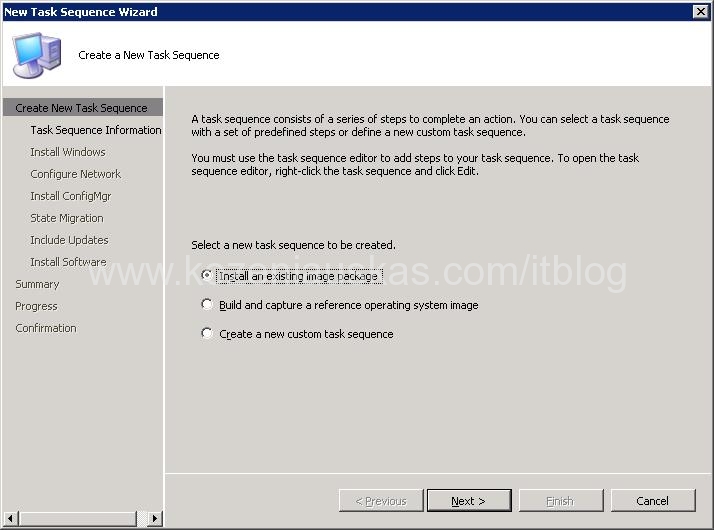
Navigate to < Site DB -> Computer Management -> Task Sequences > within SCCM console. Right click and choose to create a new task sequence. Select 'build and capture a reference operating system'. Choose a suitable name as detailed in the screen capture below, in addition to selecting a x86 or x64 boot image and click next.
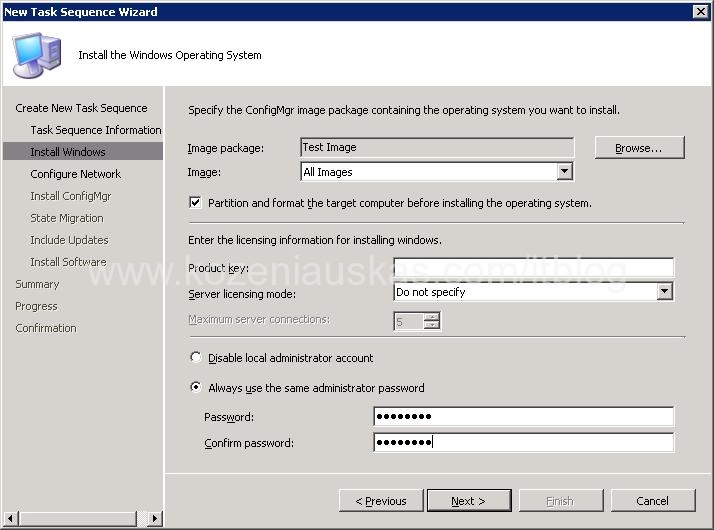
The next screen will ask which installation package to use, we will select the installation image we added earlier. Once selected use the drop down to select the specific edition to install - for this lab situation we will be using windows 7 professional (production environments may use enterprise to avoid per machine activation). Don't enter a product key at this stage, tab or click to the next section and pick a suitable administrator password.
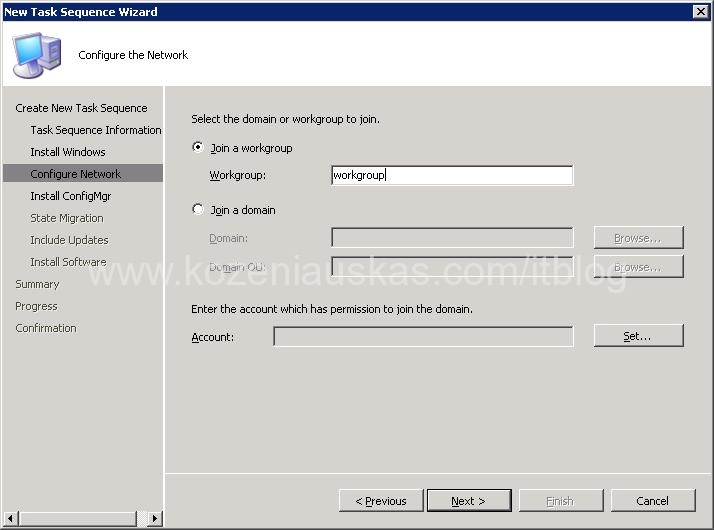
Click next and elect NOT to join a domain at this stage, although the final deployments generally will domain joined, we don't want our master image polluted with any group policy settings.
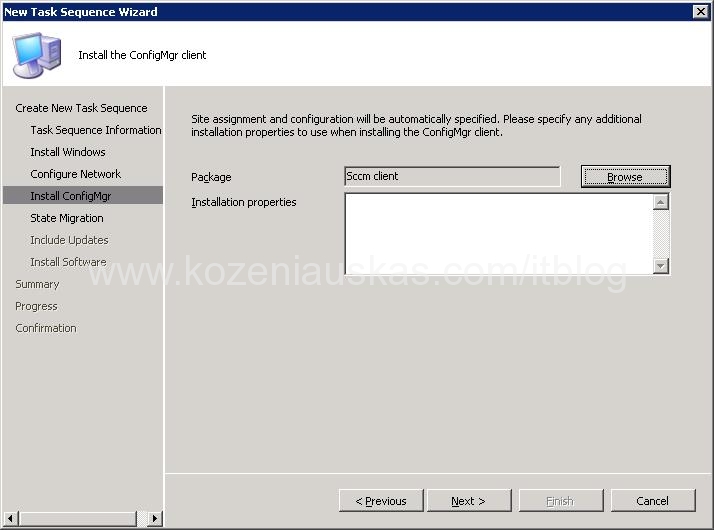
On the next screen select to install the 'configuration manager client upgrade' package we created earlier, followed by selecting NOT to install updates (Again, in a production environment you should probably choose to apply updates to minimise the images vulnerability).
On the 'image properties' screen enter suitable information (as shown below) or something more fitting your environment.
Finally click next, and enter the capture settings similar to those shown in the screencapture below. The first box will determine where the image capture is stored, the second specifies the account which will be used for the transfer&capture.
Advertise the Task Sequence
n order to allow & control which machines the sequence will be operated upon we need to advertise the sequence to a specific collection which can contain one or more machines. To accomplish this locate the task sequence created in the previous step, right click and select advertise.
On the first screen pick a suitable name for the advertisement, ensure the task sequence is set to the one we just created and pick a suitable collection to which it will be advertised. Also ensure that the 'make this task sequence available to boot media and PXE' checkbox is active.
Click next and on the schedule screen and use the yellow start to set the schedule to as soon as possible. In addition set the options as per the second screenshot to ignore maintenance windows, allow system restarts outside maintenance windows, configure as high priority and finally always re-run program.
Click next and on the distribution points dialogue set the options as indicated below.
Click next again and on the interaction screen ensure that the option to show progress is selected, click next on all screens from this point, accepting any defaults. Once complete the advertisement is active and we should add a machine to the build & capture collection to progress.
Expand < SiteDB -> Computer Management -> Operating System Deployment -> Computer Association > Right click and 'import computer configuration. Elect to import a single computer and click next. Enter the unique identification for the machine (I suggest MAC address) and follow the dialogues through, entering the correct 'build & capture windows 7' collection when prompted.
N.B if a machine is already in the system, you can add it manually to a collection by locating the collection, Right click and select properties and then click the membership rules tab. Click on the computer symbol to add static membership.
At this point you are ready to proceed to the next step and run the build and capture process on your master workstation.
Installation & Capture
Start the machine which will run the build & capture task sequence and select network boot. Ensure that the machines first boot priority is network and its second is the HD.
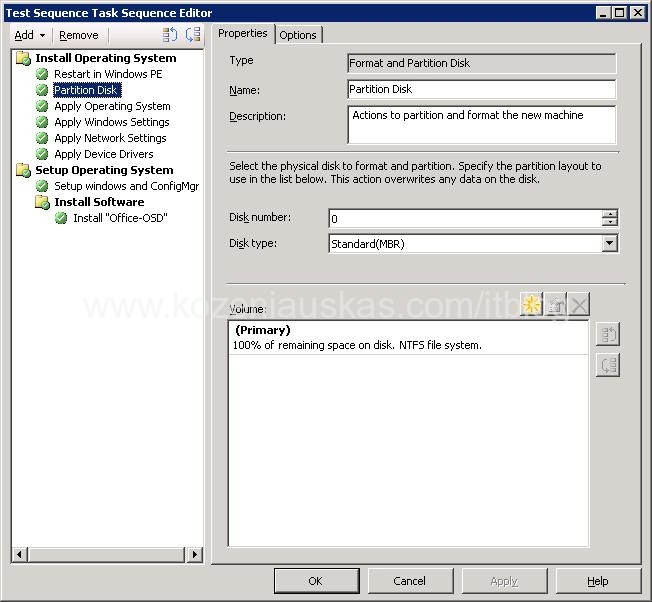
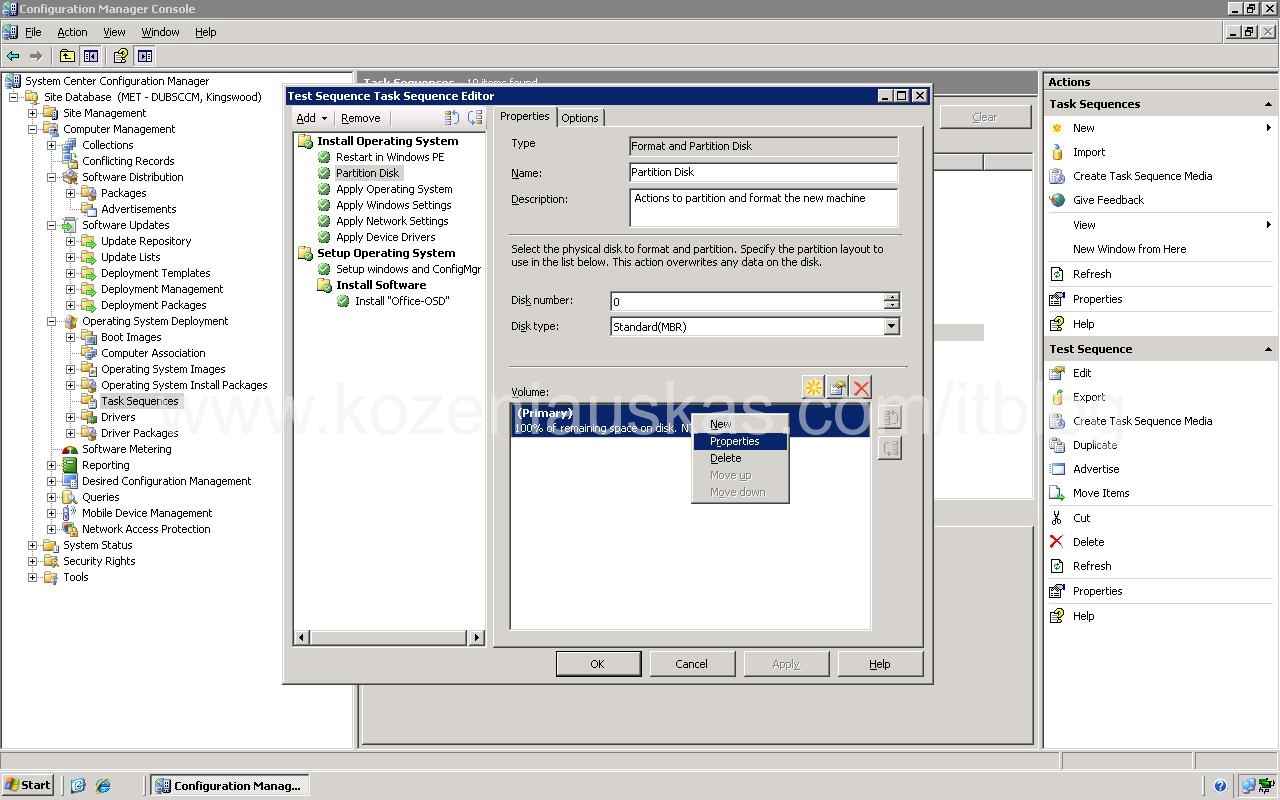
Windows PE will boot and begin by partitioning the primary HD of the target computer.
At this point the machine will install windows 7 and proceed through a series of reboots, performing a different action at each point.
Once completed the system may reboot one last time and the capture process will begin, this could take anywhere from five, to fifty minutes or longer depending on the hardware and network speeds in your environment. Once completed two things will happen, firstly the machine will reboot into the screen as shown below and secondly you will have a .wim capture within your SCCM capture sources share as defined earlier.
Adding the operating system image
Expand <Site DB -> Computer management -> Operating System Deployment -> Operating System Images > Right click and select Add operating system.
Click next and when asked for the location of the image enter < \\can-dev-dc2\sources\cap
Accept all defaults to finish the wizard and return to the SCCM console. Expand the image, click distribution points and right click -> new distribution points. Again, this stage may need some though on the part of the reader, but in a lab environment elect to deploy to any NON PXE distribution points.
Proceed through the wizard and return to SCCM console. Locate the distribution points, right click and select update distribution points.
Installation Task Sequence
After many preparatory steps we're now at the stage where we can deploy our machine(s). Any machines you wish to deploy will need to be in the Deployment -> Windows 7 collection ( if you havent already created this you should do so now, the process is the same as when you created a build & capture collection earlier).
Using the SCCM console expand < Site DB -> Computer Management -> Operating System Deployment -> Task Sequences >, right click and elect to create a new task sequence. Select to install an existing image package as indicated on the screengrab below.
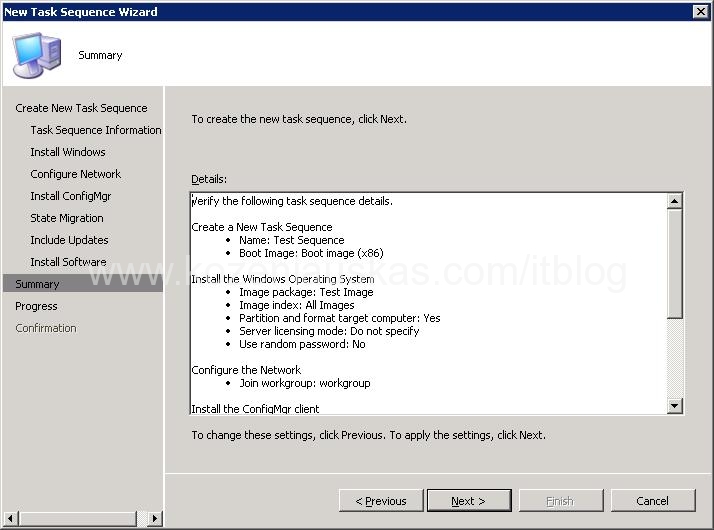
Click next and assign the sequence a suitable name and boot image as shown below.
Click next and select the image package we created in the previous step, the image '1-1' and leave all other options as default with the exception of administrator password which you should set as appropriate for your environment.
Click next and this time we will configure the sequence to join the deployed machine to the domain, this section is of course environment specific but see the screen dump below for my settings. The domain OU box can be filled in either manually with a LDAP string, or by clicking browse (recommended)
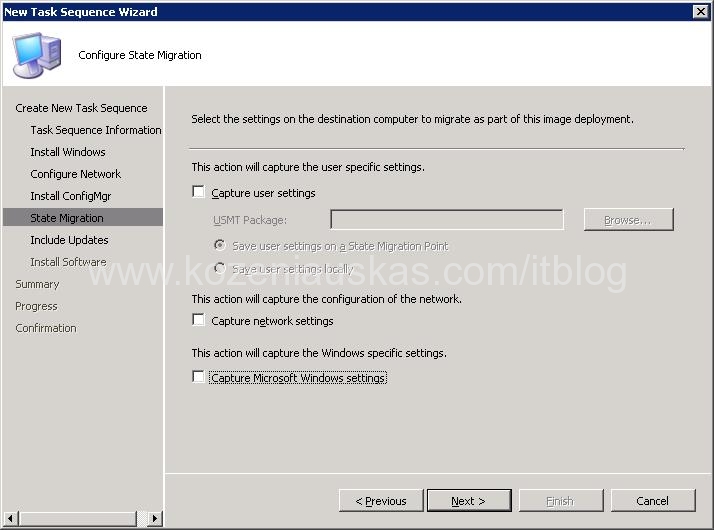
Click next and this time you will be provided with options for user state migration, as this is a lab situation and we have no previous data on our machines I decided to de-select all the options.
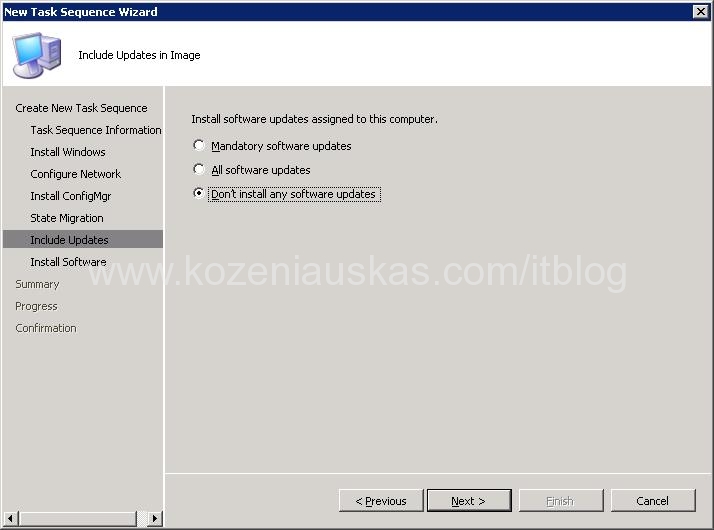
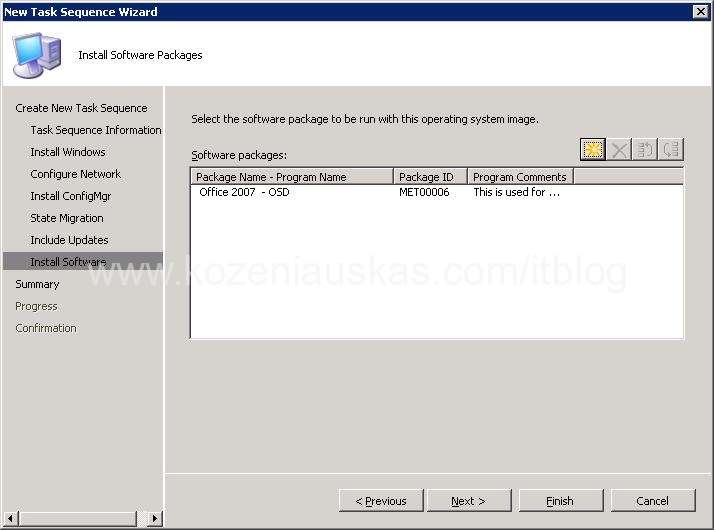
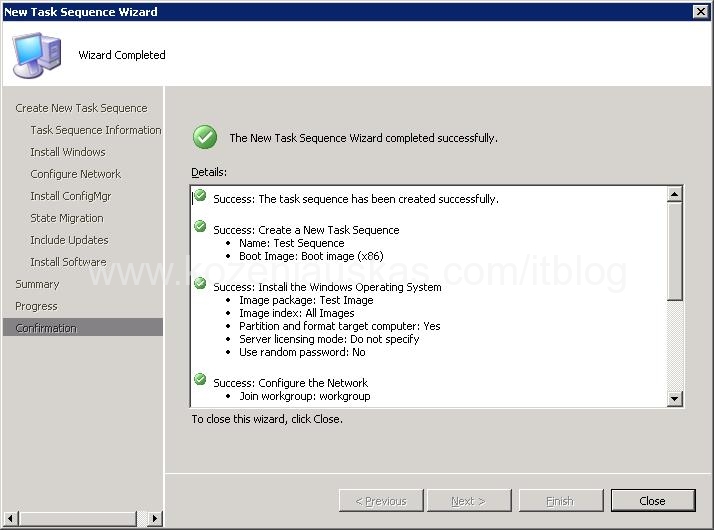
Click next and choose your update strategy - either to install updates during deployment or not. This will differ depending if your following this guide in lab or production settings ( I decided NOT to install updates). Complete the wizard by accepting defaults and then advertise the sequence by right clicking and selecting advertise.
As with the build and capture advertisement, follow the screen shots below and make any alterations needed depending on your environment.
Perform the installation
Ensure the machine you are deploying on is imported into SCCM (described above) and that its associated with the deployment -> windows 7 collection (also previously described).
Start your virtual or physical machine you are using for deployment testing and configure to boot from PXE first and HD second. The machine should boot into windows PE and proceed to install the OS, configuration settings, additional packages and any other options which have been set. Follow the screen shots below for a overview of what the process should look like.
After a final reboot the windows 7 machine will be in a useable state joined to the domain with the windows management client installed. Further customisation is possible but that is beyond the scope of this article. I hope this was of some help, as usual please add any comments, errors or omissions you find while following my guide - I'll commit to keeping it maintained.
SCCM2007 is a powerful multi-purpose system with many enterprise applications, one of which is deployment. Over the last few weeks I've been testing windows 7 deployment in a test-lab and have discovered a number of things 1) the guides which exist on the web are full of conflicting information and aren't entirely suited to novice IT professionals and 2) the process is easier than you think. With this guide I hope to give an end-end overview of the process, staying concise and keeping it directed at beginners.
Deployment through SCCM can be as simple or complex as required, but all deployment operations can be distilled down to a number of basic steps :-
1)Obtain and provide installation media and/or data files.
2)Create a task sequence to perform a 'build & capture' of the OS, packages, driver files and perform any system configuration.
3)Advertise the task sequence to one or more 'master' machines.
4)Perform the installation and Capture
5)Add the 'master' installation image to SCCM
6)Create a Task sequence for the installation process and advertise it to a collection.
7) Perform the installation on one, ten, one hundred or more target machines.
Installation Media & Preparation
Create a 'sources' tree at a suitable location on the SCCM server, for my lab environment this was the C drive in < c:\sources\os\7\retail\x6
At this stage we should also prepare the collections used further in the article. Expand < Site Database -> Computer Management -> Collections > and create a suitable structure, for my lab environment I've created a 'build and capture' parent folder, and a 'build and capture windows 7' child; if nothing else this will ensure that we are consistent between lab and production environments.

Next we need to ensure we have the SCCM2007 client installation package ready to go, it will be installed at a later stage so we can go ahead and create it now. Open the SCCM2007 console and navigate to 'Software Distribution -> Packages', Right Click 'new package from definition'.

Select the 'Configuration Manager Client Upgrade' and click 'Next'. On the following screen select 'Always obtain files from a Source Directory' and click 'Next'. On the screen displayed next set the options as shown in the screen-shot below, obviously altering the path as appropriate for your environment.

Finish the wizard and allow the package to be created. Once done, expand the package, select distribution points, right click and select 'new distribution points'. Which points you deploy to will depend on your environment but as a rule select any 'NON PXE' points as shown below. Complete the wizard and then update the distribution points in the usual way.

The last aspect we need to configure is to provide SCCM with the location of the installation files we copied in the first step above. Using SCCM2007 console navigate to < Site DB -> Computer Management -> Operating system deployment -> operating system install packages > Right Click and select 'Add operating system install package'.

When asked for the source directory path, enter the UNC location for the installation media you copied to the share earlier. In the case of my lab environment this is in < \\can-dev-dc2\sources\os\

Enter suitable detailed for the OS installation package as exemplified on the screengrab below and finish the wizard.

Once the package has been created, expand it in the SCCM console, select distribution points, right click -> new distribution points. Select any 'NON PXE' distribution points (be sure to pay attention at this stage) - the image is a installation image and NOT a boot image so selecting PXE would be wrong. Once completed, Right click distribution points and select 'Update Distribution points'.
Task Sequence
At this point the majority of the preparation activities have been completed. Our aim in this section is to create a task sequence which controls the installation of a base windows 7 image, together with a capture activity at the end of the process. The end result will be a master windows 7 image which can be used for any deployment activities within your lab, or around your organisation.
Navigate to < Site DB -> Computer Management -> Task Sequences > within SCCM console. Right click and choose to create a new task sequence. Select 'build and capture a reference operating system'. Choose a suitable name as detailed in the screen capture below, in addition to selecting a x86 or x64 boot image and click next.

The next screen will ask which installation package to use, we will select the installation image we added earlier. Once selected use the drop down to select the specific edition to install - for this lab situation we will be using windows 7 professional (production environments may use enterprise to avoid per machine activation). Don't enter a product key at this stage, tab or click to the next section and pick a suitable administrator password.

Click next and elect NOT to join a domain at this stage, although the final deployments generally will domain joined, we don't want our master image polluted with any group policy settings.

On the next screen select to install the 'configuration manager client upgrade' package we created earlier, followed by selecting NOT to install updates (Again, in a production environment you should probably choose to apply updates to minimise the images vulnerability).
On the 'image properties' screen enter suitable information (as shown below) or something more fitting your environment.

Finally click next, and enter the capture settings similar to those shown in the screencapture below. The first box will determine where the image capture is stored, the second specifies the account which will be used for the transfer&capture.

Advertise the Task Sequence
n order to allow & control which machines the sequence will be operated upon we need to advertise the sequence to a specific collection which can contain one or more machines. To accomplish this locate the task sequence created in the previous step, right click and select advertise.

On the first screen pick a suitable name for the advertisement, ensure the task sequence is set to the one we just created and pick a suitable collection to which it will be advertised. Also ensure that the 'make this task sequence available to boot media and PXE' checkbox is active.

Click next and on the schedule screen and use the yellow start to set the schedule to as soon as possible. In addition set the options as per the second screenshot to ignore maintenance windows, allow system restarts outside maintenance windows, configure as high priority and finally always re-run program.


Click next and on the distribution points dialogue set the options as indicated below.

Click next again and on the interaction screen ensure that the option to show progress is selected, click next on all screens from this point, accepting any defaults. Once complete the advertisement is active and we should add a machine to the build & capture collection to progress.
Expand < SiteDB -> Computer Management -> Operating System Deployment -> Computer Association > Right click and 'import computer configuration. Elect to import a single computer and click next. Enter the unique identification for the machine (I suggest MAC address) and follow the dialogues through, entering the correct 'build & capture windows 7' collection when prompted.

N.B if a machine is already in the system, you can add it manually to a collection by locating the collection, Right click and select properties and then click the membership rules tab. Click on the computer symbol to add static membership.


At this point you are ready to proceed to the next step and run the build and capture process on your master workstation.
Installation & Capture
Start the machine which will run the build & capture task sequence and select network boot. Ensure that the machines first boot priority is network and its second is the HD.

Windows PE will boot and begin by partitioning the primary HD of the target computer.

At this point the machine will install windows 7 and proceed through a series of reboots, performing a different action at each point.


Once completed the system may reboot one last time and the capture process will begin, this could take anywhere from five, to fifty minutes or longer depending on the hardware and network speeds in your environment. Once completed two things will happen, firstly the machine will reboot into the screen as shown below and secondly you will have a .wim capture within your SCCM capture sources share as defined earlier.

Adding the operating system image
Expand <Site DB -> Computer management -> Operating System Deployment -> Operating System Images > Right click and select Add operating system.

Click next and when asked for the location of the image enter < \\can-dev-dc2\sources\cap

Accept all defaults to finish the wizard and return to the SCCM console. Expand the image, click distribution points and right click -> new distribution points. Again, this stage may need some though on the part of the reader, but in a lab environment elect to deploy to any NON PXE distribution points.

Proceed through the wizard and return to SCCM console. Locate the distribution points, right click and select update distribution points.
Installation Task Sequence
After many preparatory steps we're now at the stage where we can deploy our machine(s). Any machines you wish to deploy will need to be in the Deployment -> Windows 7 collection ( if you havent already created this you should do so now, the process is the same as when you created a build & capture collection earlier).
Using the SCCM console expand < Site DB -> Computer Management -> Operating System Deployment -> Task Sequences >, right click and elect to create a new task sequence. Select to install an existing image package as indicated on the screengrab below.

Click next and assign the sequence a suitable name and boot image as shown below.

Click next and select the image package we created in the previous step, the image '1-1' and leave all other options as default with the exception of administrator password which you should set as appropriate for your environment.

Click next and this time we will configure the sequence to join the deployed machine to the domain, this section is of course environment specific but see the screen dump below for my settings. The domain OU box can be filled in either manually with a LDAP string, or by clicking browse (recommended)

Click next and this time you will be provided with options for user state migration, as this is a lab situation and we have no previous data on our machines I decided to de-select all the options.

Click next and choose your update strategy - either to install updates during deployment or not. This will differ depending if your following this guide in lab or production settings ( I decided NOT to install updates). Complete the wizard by accepting defaults and then advertise the sequence by right clicking and selecting advertise.

As with the build and capture advertisement, follow the screen shots below and make any alterations needed depending on your environment.


Perform the installation
Ensure the machine you are deploying on is imported into SCCM (described above) and that its associated with the deployment -> windows 7 collection (also previously described).
Start your virtual or physical machine you are using for deployment testing and configure to boot from PXE first and HD second. The machine should boot into windows PE and proceed to install the OS, configuration settings, additional packages and any other options which have been set. Follow the screen shots below for a overview of what the process should look like.


After a final reboot the windows 7 machine will be in a useable state joined to the domain with the windows management client installed. Further customisation is possible but that is beyond the scope of this article. I hope this was of some help, as usual please add any comments, errors or omissions you find while following my guide - I'll commit to keeping it maintained.